This post may contain affiliate links and we may earn compensation when you click on the links at no additional cost to you.
Japan Rail Pass, also known as JR Pass, is a train pass only available for foreign visitors to Japan on a temporary visitor status and Japanese nationals with a proof of permanent residency outside of Japan. They are available in 7-, 14-, or -21- consecutive day increments and there is no limit on how much you can use within those days. Japan Rail Pass is a must-have item if you are planning to see Japan as much as you can during your stay. Just like everything else in Japan, JR Pass works like a well-oiled machine. But here are a few tricks and tips on how to use the Japanese Rail Pass to help make you feel confident using it!
National and Regional JR Passes
There are two categories of the passes – National and Regional. If you know that you want to stay super focused in one area, Regional is the way to go since it is cheaper than National. But the National level gives you the flexibility you need if you are traveling through multiple regions and just as cost effective, if not cheaper, than buying multiple regional passes.
Understanding the Japanese railroad systems
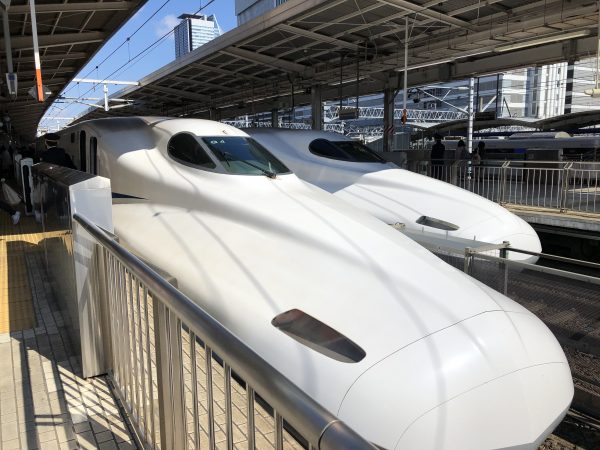
There are multiple railroad systems in Japan, owned by various companies. And some region have their own railroad systems to add to the confusion. The Japan Rail Pass is only usable for the trains on the JR (Japan Railways) network. And on a very limited bases, some JR buses, ferries and monorails. The good news is the Shinkansen, or the bullet train that can reach maximum speed of 200 mph, is part of the JR system as is a large portion of the railroads in Japan.
When you are using the JR Pass, make sure that you go to the JR ticket counters and JR Line train stations. Many larger stations have multiple railroad networks in one. This can be overwhelming, but just look for JR Line signs. All the signs in train stations are fairly clearly labeled and almost always also in English. Knowing what to look for is half the battle. You got this!
Is the Japan Rail Pass worth the money?
As convenient as railroad systems are, the fare charges can add up very quickly, especially when you are using Shinkansen. For example, reserved seat fare on Hikari Shinkansen between Tokyo and Kyoto costs 13,600 yen one way. Let’s assume the exchange rate of $1 USD = 110 yen. The cost of this one-way ticket is about $124 USD. If you purchased the 7 day pass, regular level, at $260 (as of Spring 2019). You’ve already almost broke even when you buy a roundtrip ticket for $248. Here is a great calculator that can help you determine if it’s worth the cost based on trips you are planning to take.
With a little bit of planning, JR Pass can be a great value. The trick is that you can only buy them in a 7-, 14- and 21-day increments and those days must be consecutive. So, if you activate your pass to start anytime on 7/1 for example, your 7-day pass is only good through end of the day 7/7. To make the most out of the pass, try to schedule all your longer distance trips within those consecutive days. You don’t have to decide the exact dates to use when you purchase your voucher.
Two levels of JR Pass
There are two levels of the JR Pass – “Ordinary” or “Green.” Green pass gives you access to the reserved seats on “Green Cars” which are the first class cars with more space. For about $120 more for the 7-day ticket, it’s hard to justify the cost for upgrade. Unless, of course, you always travel first class! It may be worth it during the heaviest travel seasons in Japan when even the reserved seats may be scarce. There are also Child Passes for children ages 6 to 11, in both Ordinary and Green levels.
How to purchase your JR Pass
You purchase JR passes online from one of the official vendors such as:
But this isn’t like buying an airline ticket online. You must have the physical voucher (aka “Exchange Order”) mailed to you (i.e., you cannot print them online) for you to take with you to Japan to activate. This means that you have to plan ahead to make sure that you have the voucher in your possession before you leave. The cost to have the pass mailed to you is usually included in the price.
How to activate your JR Pass
Activating and using the JR pass tripped me up first couple of times until I got the hang of it so here are some useful tips with pictures!
To activate, first and foremost, take your passport and the voucher (“Exchange Order”) with you to exchange the voucher into a JR Pass. You can activate the pass up to 30 days in advance as long as you know the exact first day to start using your pass. You don’t have to activate it on the day you want to start using it. As matter of fact, I recommend you do exchange the voucher to the pass in advance. That way, you are not rushing around the morning of your trip and potentially miss the train you are planning to take.
You can exchange the voucher and activate your pass at a JR Office, usually located in the main train stations or within the international airports in Japan. Note their hours of operation in advance, too. Some of the offices may not open until 10 a.m. or some of them are closed on Sundays and national holidays. Show your passport to the agent at the counter to exchange the voucher for your pass. Your activation dates will be stamped on your pass. Passport is not required to use the JR Pass after it’s activated. But keep your JR Pass in a safe but accessible spot as you travel. JR Pass or the voucher cannot be reissued if it’s lost or stolen. You will have to buy a new one, which is only possible at a very few designated offices.
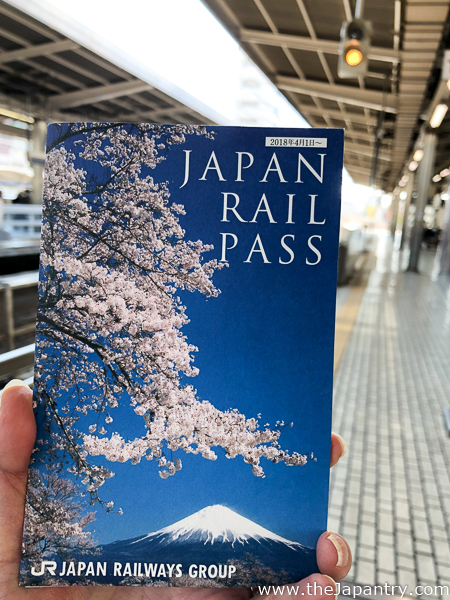
HOW TO USE YOUR JR PASS
Obtaining your reserved seat tickets
Once you have the pass activated, you don’t need to obtain the ticket for the train unless you want a reserved seat on the Shinkansen or any of the “Limited Express” trains. Getting a reserved seat with your JR pass doesn’t cost you anything extra (note the exclusions below) and it will make your travel so much easier. You don’t have to rush into the train to fight to find an empty seat. Plus, you can relax knowing that you’ll have a seat on your way back from a long day walking around. You should always plan ahead for the reserved seat since they could be sold out if you try to buy it on the day of your trip.
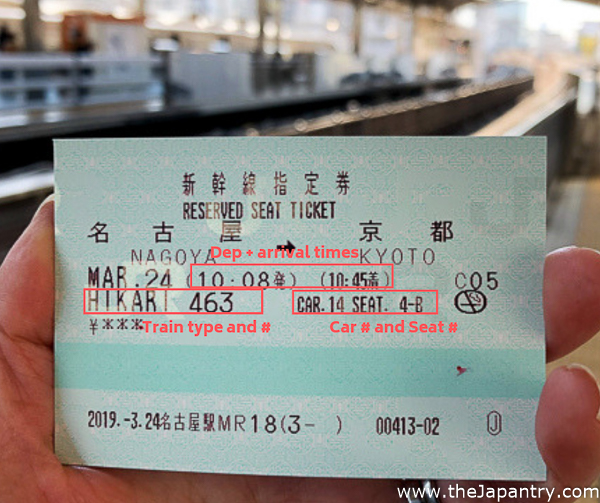
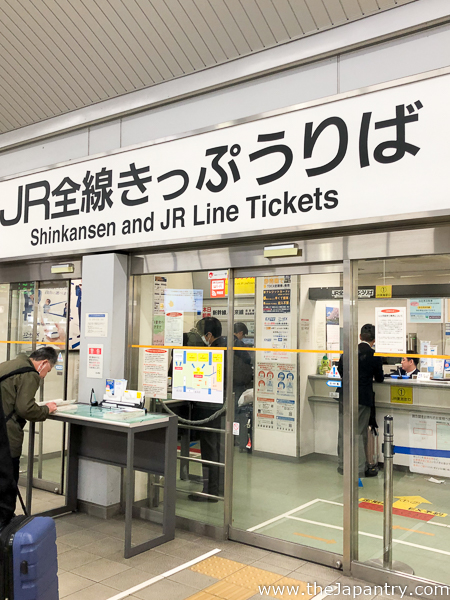
You can obtain reserved seat tickets by visiting a booking office at the train station and showing your JR Pass. These booking offices are either called “Shinkansen and JR Line Tickets” or may be called “Midori no madoguchi” which translates into “green window” and their sign are in green. All these signs are in English, too, so that they should be easy to spot.
Going through the ticket gate/turnstiles
The proper way to go through the ticket gate even if you have a reserved ticket, is to show your JR Pass to the staff at the booth, usually on the far left- or right-hand end of the rows of automatic gates. They’ll quickly check the dates shown on the pass and let you through. Just be sure to have the pass ready by the time you reach the booth with side that shows the activation dates facing up. Also have your reserved seat tickets ready on the train as the train attendants may come through the cart asking to see them.
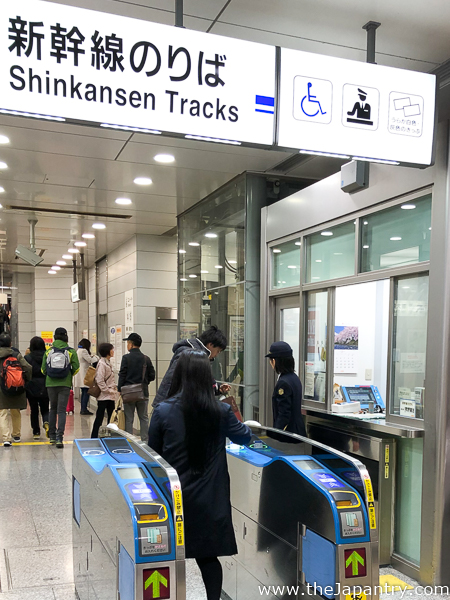
Once you are at the platform, you’ll have to find the designated reserved cars or non-reserved cars, depending on whether you obtained the reserved seat tickets or not. They will show on the board or announce how many cars there are in the upcoming trains and which cars are designated for Green and reserved seats.
Understand the exclusions
JR Pass cannot be used for travel, reserved or non-reserved, on NOZOMI and MIZUHO Shinkansen. Those are the super express trains with very few stops making them the fastest travel options between some of the major cities. HIKARI usually is the fastest Shinkansen option you have access to using JR Pass. It’s rare but there are some occasions on the regional trains where JR train uses non-JR tracks. JR Passholders will be required to pay supplemental fare for that part of journey. The train attendant will come around to collect the additional fare when that happens.
Whew. That’s a lot of information. But hopefully, knowing some of these things upfront can help make your travel experience more enjoyable!
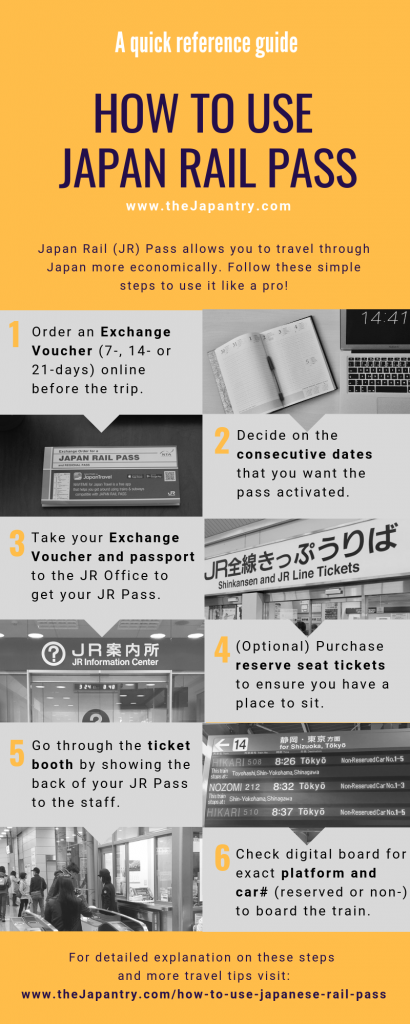
Pin this “How to Use JR Pass Guide”!
Pin this easy-to-reference version of this guide, complete with pictures:
Related Posts
10 Mistakes to Avoid When Planning a Trip to Japan
There are basic planning tips can help make your trip to Japan even more enjoyable…
August 11, 201912 Japanese words you should know when visiting Japan
You just scheduled your dream vacation to Japan! You are filling your itineraries with…
May 13, 2019


Leave A Comment